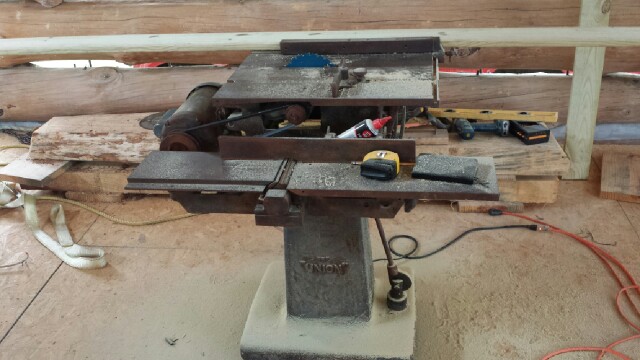

1921 Gallmeyer & Livingston “The Union” table saw / jointer combo. Useful for making extremely accurate cuts.
The Setup
The front door of a house says a lot about what’s inside. It also says a lot about the designer / builder. Much has been written about front doors. And you can’t just use any old door for a log cabin – they don’t look right. I couldn’t see building the entire house, and then “buying” a door – just seems like a cop-out. Yes, I know – I bought shingles instead of froeing them from cedar…. 🙂 I was surprised when I looked at front doors at the hardware store – they can be extremely pricey. And if you want something grand with side glass – plan on $5,000+. A simple solid wood door with character at the orange box place is about $1,000, so I knew there had to be a better way.

The LHBA recommends building a Z-door, and many of our members build wonderful doors in this style. It is simple and effective and looks great on a log home. I don’t mind the bolts on a Z-door, but my wife didn’t like the look.

A nice looking z-door.
I like the fortress look myself, with 6″+ thick doors and wrought iron hinges, but let’s not go all medieval here, ok? I like being married more. 🙂 I’ll make one for you if you want, later on when I get my woodworking shop up and running. So then I thought, ‘what if the bolts and the z-frame were on the inside, and we put the tongue and groove boards on the outside?’ After I weeded out the sliding barn door images, I found this one:
HOW TO BUILD A DOOR – Warm, Exterior & Beautiful (with plans)

nice door by bailyline
Julie said she liked the clean look of this door and said I could build it, if I followed the plans exactly. Yes, I like to stray a bit and add my own flair to things. 🙂 It should take about 6 hours or less to build this door. You’ll need at least one night overnight for the glue to dry, and probably two nights of drying if you want to do a really good job.
Materials
Turns out, I couldn’t follow the plans exactly, as not everything is 100% spelled out in these plans. For example, what size finishing nails will work? And in one part, he talks about “gluing and screwing” the inner frame, but doesn’t say where to put the screws. Probably a well-trained carpenter already knows, but I’m mostly self-taught. I came up with my own method in these areas, and I think it is very good. I believe this home-made door is very solidly built, and if sold in the orange box store, would probably retail for $500 – $700. If you can make exact cuts on a table saw, you can build this door.
Materials and Tools list:
5/4 decking lumber. 3 @ 10′. These are 1×6’s that are a full 1″ thick. 1×6 pine tongue and groove. 14 @ 8′.1 @ 2x4x8′ for making trim. 1″ poly/EPS foam insulation sheetminimally expanding foam sprayknife or hacksaw bladetitebond III glue. 2 bottles.polyurethane sealer. 2 regular sized cans- it says masonry, but should work fine.construction screws. box of 2″. wood screws. box of 1″ stucco screws (they have a very low profile head).finishing nails. box of 1-1/2″Tools: hammer and a scrap of wood for a block, table saw, chop saw (for bevels) tape measure, square, pencil, drill/driver, small plane, sander.
Materials will run about $145, not including hinges/door latch. Labor is about 6 hours if you know what you are doing, not including letting it dry overnight (2 nights are needed). But remember, this would be a $500 door at the box store. At least.
The process / problems / solutions The inner frame 
pile of lumber

setting the blade for exactly 5 inches

nice 5 inch cut

finished the lap joint

testing the fit – it is perfect.

another view of the perfect joint
Run the 5/4 decking lumber through the table saw to make it exactly 5″ wide. Then cut two long pieces at 79″. These are your legs. You should have enough scrap to make two side pieces that are 35″ long. Make another 35″ long piece out of the third piece of decking lumber, and save the last length for the angled braces. Cut the lap joints: This is where the door gets its strength so take your time on this step. Each leg has 3 half lap joints that are 5″ wide. Cut the two joints on the ends, then measure down to find the middle one, just like he says in the plans above. Except I found that the spacing is not 32 1/2″ like he says – it is 32″. (32″+32″+5+5+5 = 79″). Measure twice, cut once. The better you cut the lap joints – meaning the tighter they fit- the stronger your door. Cut corresponding lap joints in the side pieces. The table saw or a router can be used to cut the lap joints. Set the blade at exactly half the thickness of the lumber – should be 1/2″, but do a fit test on some scraps to be 100% sure. If you’re 1/32″ too high on your cut, that’s still ok – then you can sand it to get the exact fit you want. The lap joints should be perfectly flush when the pieces are fit together. I just lay the flat piece on the saw, and push it through with 85 passes until it looks good.Once the lap joints are all flush and tight, and you checked all your corners for square, you are ready to glue. Lay the whole thing on the floor and glue the lap joints. Then use the stucco flat top screws to hold it together. Double check that it is square. Don’t screw this part up.Once the frame is glued, you can cut the angled braces. They should be about 40 1/2″, but I don’t measure them that way. Instead, draw a center line on your stock, and lay the door frame over it – lining up the corners of the frame with the center line on the stock. Trace the corners from the frame onto the stock, then cut them out with the table saw. Pay attention to which way you lay them- you want the braces going up from the bottom of the door. This is how the weight of the latch edge of the door is transferred over to the load bearing hinges. When you nail the sheathing on, you won’t be able to tell which way the angled braces run, so write “top”, “hinge”, “latch”, and “bottom” to remind yourself. Fit the angled pieces in place and glue the butt ends to the corners of the frame. Drill pocket holes near the corners of the angled braces and use construction screws to attach the braces to the door frame. 
lay out the pieces. I had to clamp about 1/4″ of bow out of one leg.

Screw and glue, then add the diagonal braces

detail of screwed joint
Sheathing side one Once the frame is glued, you can sheath one side. Run the first 1×6 T&G board through the saw to cut off its groove. Only do this to one board! Don’t do this to the other boards! Line up the formerly grooved side with the edge of the inner door frame. Glue anywhere the wood frame will touch the 1×6 sheathing. Your 1×6 might be bowed. Line up the ends first and nail them in place, then muscle the bow out of the middle if you have one. This first board sets the standard for the other boards, so do a good job with it.Keep the clamps in place while you nail the other 1×6’s in place. Apply polyurethane sealer in the groove of each 1×6 just like he says. Also glue the frame where the sheathing will touch. Use the block and your hammer to make each T&G fit tight to the previous board. Nail through the tongue, right in the joint at an angle. Probably 3 nails per 5″ of frame is good. 
getting the first board perfect sets up the rest.

nice! just needs trim.
Insulation Turn the whole thing over. Cut out triangles of insulation and glue them in place in the spaces between the angled braces. Do as he says in the plans and leave about 1/2″ gap all around the insulation. Wait for the glue to dry! Otherwise, the spray foam will push the pieces around as it dries. Don’t ask me how I know…. (This is where you should stop for the night).After the glue is dry, fill in the gaps between the insulation and frame with the foam spray. It’ll dry in about 30 minutes. Then use a knife or hacksaw blade to shave off the excess. 
ready for insulation

leave a bit of a gap around the edges.

dry overnight, then add spray foam to gaps

shave off the excess foam, then install second side of sheathing

done.
Sheathing side two Nail the second side of sheathing just like the first. Trim / Hinges / door holes
It’s probably easiest just to make your own trim. Find the thickness of your door – mine was 2.5″. Cut a 2×4 down to this size. Then turn it on its side and make 2.5″ x 1/2″ trim pieces out of it. Bevel the ends at 45 degrees. Use a planer to flatten each edge before installing the trim. On the hinge side of the door, flattening should be easy. On the latch side, you’ll have small gaps between the tongues and the door frame. I just used the scrap from cutting off the grooves in “Sheathing side 1, step 1”, and glued it into the gaps. Once all the edges are planed, glue and nail the trim, making sure not to put nails where the hinges or latch will go.
Use a kit to install the door holes and hinges. Yes, it is worth the $25 for the kit with templates, hole saws, and stuff. Make sure you follow the “top” and “bottom” you marked out on your door. Don’t use the wimpy 1″ screws they give you for the hinges – use nice long ones.
Conclusion 
almost done. Needs a door frame / stain / etc.
It is a beautiful door. We will stain it to match the logs. I will post pictures on a subsequent post of the doors installed in their frames. I think the doors weigh over 100 pounds. They are a bit thicker than a normal door, but that’s how we like it.
Rate this:Share this: Click to share on X (Opens in new window) X Click to share on Facebook (Opens in new window) Facebook Click to share on Pinterest (Opens in new window) Pinterest Like Loading… Related